Fix: WordPress Memory Exhausted Error – Increase PHP Memory
Are you seeing an allowed memory size exhausted error message in WordPress?
This is one of the most common WordPress errors, and you can easily fix it by increasing the PHP memory limit in WordPress.
In this article, we will show you how to fix the WordPress memory exhausted error by increasing the PHP memory limit.

What Is the WordPress Memory Exhausted Error?
WordPress is written in PHP, which is a server-side programming language. Additionally, every website needs a WordPress hosting server for it to function properly.
Web servers are just like any other computer. They need a certain amount of memory to efficiently run multiple applications at the same time. Server administrators allocate specific memory sizes to different applications, including PHP.
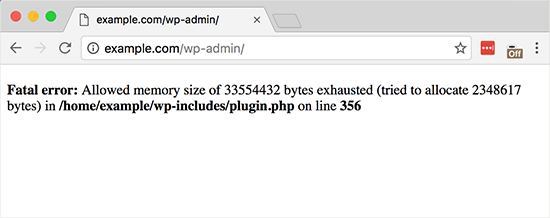
When your WordPress code requires more memory than the default allocated memory, you will see this error message:
Fatal error: Allowed memory size of 33554432 bytes exhausted (tried to allocate 2348617 bytes) in /home4/xxx/public_html/wp-includes/plugin.php on line xxx

Your WordPress site may be exhausting its server memory if it has:
- A lot of images, videos, and other types of media
- Plenty of unused WordPress plugins
- Outgrown its hosting plan resources
By default, WordPress automatically tries to increase the PHP memory limit if it is less than 64MB. However, 64MB is often not high enough.
Having said that, let’s see how to easily increase the PHP memory limit in WordPress to avoid the memory exhausted error.
How to Increase the PHP Memory Limit in WordPress
There are several ways to increase the PHP memory limit. One is to edit the wp-config.php file, another is to tweak the .htaccess file, and the last method is to check the php.ini file.
Let’s go through each one:
Editing the wp-config.php File
First, you need to edit the wp-config.php file on your WordPress site. It is one of the core WordPress files located in your WordPress site’s root directory, usually named public_html.
You will need to use an FTP client like FileZilla or file manager in your web hosting control panel.
Next, you need to paste the following line in the wp-config.php file just before the one that says, That's all, stop editing! Happy blogging.</code
>
|
1
|
define( </code
> |
This code tells WordPress to increase the PHP memory limit to 256MB.
For more details, see our step-by-step guide on how to find and edit the wp-config.php file.
Once you are done, you need to save your changes and upload your wp-config.php file back to your server.
You can now visit your WordPress site, and the memory exhausted error should have disappeared.
Editing the .htaccess File
The next method is to edit the .htaccess file. This file is also located in the WordPress website’s root folder.
Here, you need to paste the following code before the line that says #END WORDPRESS</code
>.
|
1
|
php_value memory_limit 256M</code
                  >
|
Similar to the previous code, it will tell WordPress to increase the PHP memory limit to 256MB.p
After that, simply save your changes and upload the file back to your web server. You can now open your WordPress website again to see if the memory limit error has gone.
If you can’t find the .htaccess file, check out our guide on why the .htaccess file may be missing and how to find it.
Checking Your php.ini File
If the above methods don’t work, you may want to look at your php.ini file.
php.ini is a file that controls your PHP settings, including the PHP version and PHP scripts. It’s not a WordPress core file, as your hosting provider usually manages it.
You can check its code to see your PHP memory usage limit. For more details, you can see our guide on how to find and edit the php.ini file.
However, because this is an advanced method, we recommend contacting your web hosting provider’s support team instead to see if they can increase the WordPress memory limit manually. Otherwise, this can result in further errors.