How to Fix the Error Establishing a Database Connection in WordPress
Are you seeing the ‘Error establishing a database connection’ notice in WordPress?
This is a fatal error that makes your site inaccessible to users. It happens when WordPress is unable to make a connection to the database. Since multiple factors can affect this connection, the error can be a bit difficult to troubleshoot for beginners.
In this article, we will show you how to easily fix the ‘Error establishing a database connection’ on your WordPress site, step by step.
What Causes the Error Establishing a Database Connection in WordPress?
A database is software that makes it easy to store, organize, and retrieve data from other software.
As a content management system, WordPress uses a database to store all your content and other website data. It then connects to the database each time someone visits your website.
WordPress needs the following information for connecting to the database:
- Your database name
- Database username and password
- Database server
This information is stored in your WordPress configuration file, which is called wp-config.php.
If any of this information is incorrect, then WordPress will fail to connect to your database server, and you will see the ‘Error establishing a database connection’ error.

It is one of the most common WordPress errors. Apart from incorrect credentials, this error can also appear if the database server is down or the database files are corrupt.
Having said that, let’s take a look at how to fix the ‘Error establishing database connection’ issue in WordPress with step-by-step troubleshooting.
1. Check Your WordPress Database Credentials
The most common reason for the database connection error is incorrect credentials. If you have recently moved your WordPress site to a new host, then this is likely the problem.
Your WordPress database credentials are stored in the wp-config.php file. It is the WordPress configuration file that contains important settings, including database information.
If you have not edited a wp-config.php file before, then take a look at our beginner’s guide on how to edit the wp-config.php file for more instructions.
You will be looking for the following lines in the wp-config.php file:
|
1
2
3
4
5
6
7
8
9
|
// ** MySQL settings - You can get this info from your web
                    host ** //</code
                  >
/** The name of the database for WordPress */</code
                  >
define( </code
>/** MySQL database username */</code
>
define( </code
>/** MySQL database password */</code
>
define( </code
>/** MySQL hostname */</code
>
define( </code
> |
Here, you must make sure that the information for the database name, username, password, and database host is correct.
You can confirm this information from your WordPress hosting account dashboard. For this tutorial, we will be using Bluehost, but the process will be similar for other hosting panels as well.
Upon logging in, click on the ‘Website’ tab in the left column and then switch to the ‘Advanced’ tab. Then, scroll down to the ‘Database’ section and click the ‘Manage’ button next to it.
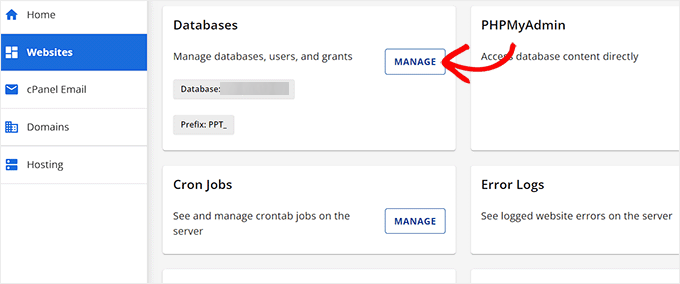
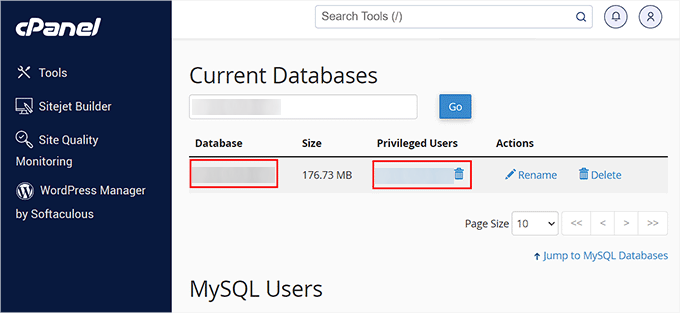
This will open the MySQL Databases page in cPanel in a new window.
Here, you can find your database name and username in the ‘Current Database’ section. Keep in mind to copy and paste these details into a notepad so you can add them to the wp-config file.
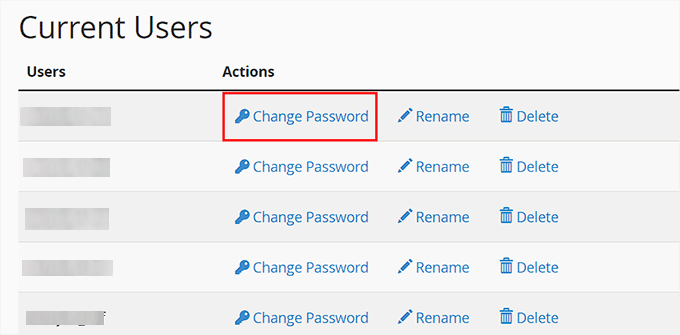
Next, scroll down to the ‘Current Users’ section, where you can click on the ‘Change Password’ link next to your database name.
This will take you to a new screen, where you can change the database password according to your liking.
Once you have confirmed all your database details, you can change that information in your wp-config.php file if needed.
After that, try visiting your website again to see if the database connection error has gone.
If you can still see the error, then this means that something else is wrong.
2. Check Your Database Host Information
If you are confident that your database name, username, and password information are accurate, then you will want to make sure you are using the correct database host information.
Most WordPress hosting companies use localhost as your database host. However, some managed WordPress hosting companies use separate servers to host databases. In that case, your database host information will not be localhost.
This means that you will need to contact your WordPress hosting company to confirm these details.
3. Repair WordPress Database
Now you may be getting a different error in the wp-admin dashboard like ‘One or more database tables are unavailable’ or ‘The database may need to be repaired’. In that case, you need to repair your database.
You can do this by adding the following line in your wp-config.php file. Make sure to add it just before the ‘That’s all, stop editing! Happy blogging’ line:
|
1
|
define(</code
> |
Once you have done that, you can see the settings by visiting this page: http://www.yoursite.com/wp-admin/maint/repair.php. Just make sure to replace yoursite.com with your own domain name.
Here, you must click the ‘Repair Database’ button to start the process.
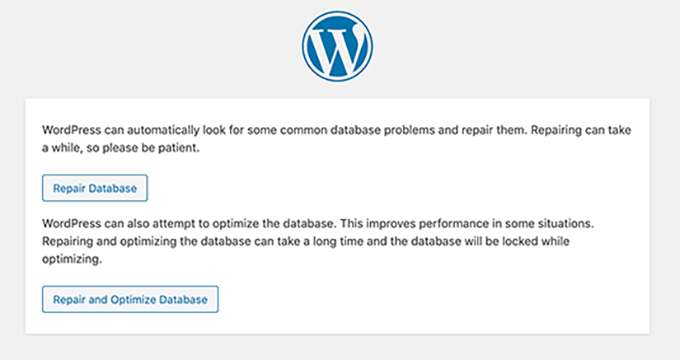
Note: The user does not need to be logged in to access the database repair page. Once you are done repairing and optimizing your database, make sure to remove this line to code from your wp-config.php.
However, if you don’t want to add any code to your site, then you can also repair your database from your hosting account’s cPanel.
Go ahead and visit your hosting account, where you must open the ‘Websites’ page from the left column. Then, switch to the ‘Advanced’ tab and click the ‘Manage’ button in the Database section.

This will open cPanel in a new tab. Here, scroll down to the ‘Modify Databases’ section and choose your database’s name from the ‘Repair Database’ dropdown menu.
Once you do that, simply click the ‘Repair Database’ button to start the process.
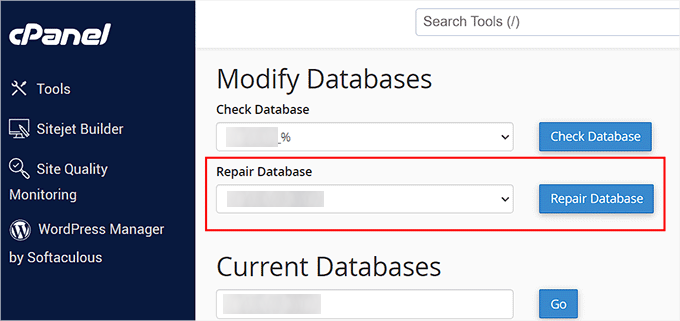
The hosting panel will now automatically repair your database for you.
Once the process is complete, you will also see a success message.
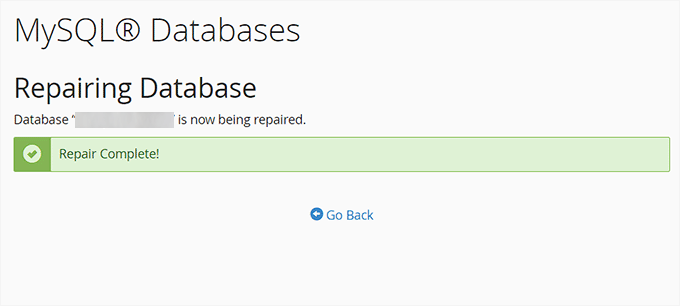
You can now visit your WordPress site to see if the error has been resolved or not.
4. Check If Your Database Server Is Down
If everything seems to be correct, and WordPress still cannot connect to the database, then your database server (MySQL server) may be down.
This could happen due to heavy traffic on a server. Your host server just cannot handle the load (especially when you are on shared hosting).
Due to this, your site will get slow, and may even output the error for some users. In this case, you should get on the phone call or live chat with your hosting provider and ask them if your MySQL server is responsive.
Additionally, if you have other websites running on the same server, then you can check those sites to confirm that your SQL server is down.
If you do not have any other site on the same hosting account, then simply go to your hosting dashboard and switch to the ‘Advanced’ tab.
After that, click the ‘Manage’ button next to the phpMyAdmin section.
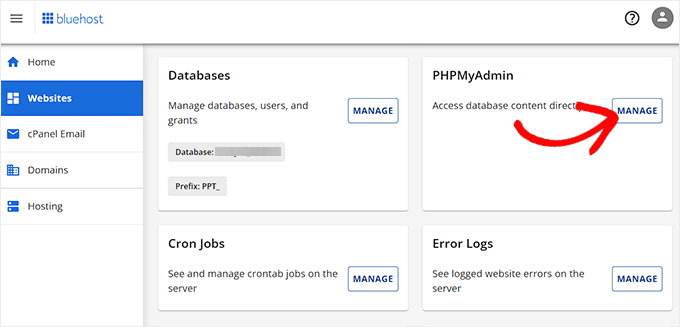
This will open phpMyAdmin in a new window, where you must click the ‘Database’ option at the top.
After that, click on your database’s name to access its settings. If you can do that, then it is time for you to check if your database user has sufficient permissions.
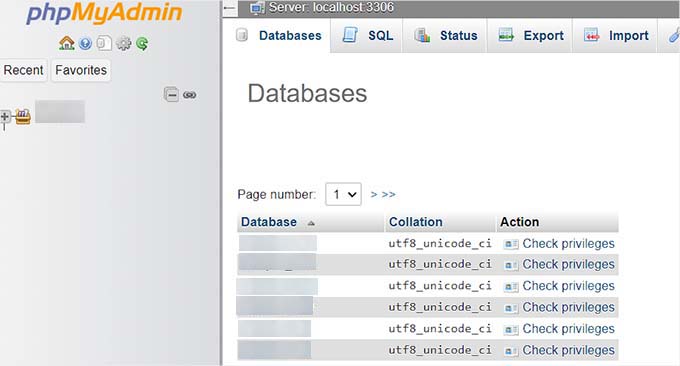
To do this, you need to create a new file called testconnection.php and paste the following code into it:
|
1
2
3
4
5
6
7
8
|
<?php</code
                  >
$link</code
>
if</code
>
die</code
>}</code
>
echo</code
>
mysqli_close(</code
>?></code
>
|
Upon pasting the code, make sure to replace the username and password with your own. You can now upload this file to your website and access it via a web browser.
If the script connected successfully, then it means that your user has sufficient permissions, and something else is causing the error.
Now, you must go back to your wp-config file and scan it to ensure that all the details are accurate and without any typos.
Additional Solutions That Have Worked for Users
If the above-mentioned troubleshooting tips fail to fix the database connection error on your website, then you may try these additional steps.
As reported by our users, these steps have helped some of them resolve the database connection error on their websites.
1. Update the WordPress Site URL
You can try updating the WordPress site URL using phpMyAdmin in cPanel.
Simply access phpMyAdmin from your hosting account dashboard and select your WordPress database from the list.
After that switch to the SQL menu on the top and enter the following MySQL query:
|
1
|
UPDATE</code
>
|
It should look like this:
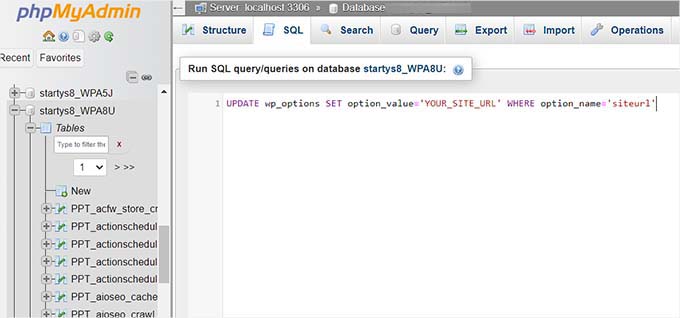
Don’t forget to provide your own site URL and change wp_options</code
> to your own table name, as you may have changed the WordPress
table prefix.
2. Rebooting Web Server
Users on dedicated servers, local servers, and virtual private servers (VPS) can try rebooting their servers.
This will restart your web and database server, which may fix some temporary glitches causing the error.